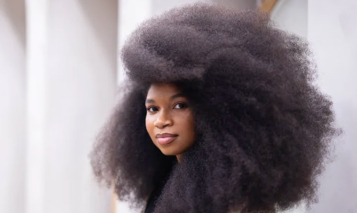
When former NAACP president Rachel Dolezal spoke with NBC Today’s Matt Lauer about her transracial orientation on Tuesday, most viewers wondered how she got her Caucasian hair to behave like black hair. The answer is simpler than you thought.
The 37-year-old hairstylist-by-trade told an NBC News affiliate that her curly hair was actually hair weave.
“This is a weave and I do it myself,” Dolezal told Amber Payne, editor of NBCBLK website.
Dolezal told Payne she would refuse to answer the same question if “I was at a grocery store or anywhere else,” because it’s “none of your business, back off.”
Dolezal is known for wearing various ethnic hairstyles including braids extensions and cornrows to bring her imagined ethnicity more in line with her reality.
Many black observers assumed Rachel’s tight curls were achieved through a process known as a straw set, aka a “protective hairstyle”. For black women with unruly tight curls, a straw set loosens our kinky curl pattern and makes natural hair more appealing to the eye.
But for white women with bone straight hair, the straw set look is nearly impossible to achieve without dumping mass quantities of damaging holding spray on their heads.
Thankfully those of us who are 100 percenters don’t have to go that route.
Blacknaps.org has tips on how you can achieve Rachel’s look with just a pack of straws, some bobby pins and a portable hair dryer.
To create this style you will need:
• Drinking straws: Yes, the sippy sippy kind. The size you need will be determined by your hairs length. 1” to 2” lengths can use regular sized drinking straws. Hair that is 2” or longer will need large diameter straws like the ones at McDonald’s (hint, hint).
• Bobby pins: To hold the straws in place.
• Gel: I prefer something with a soft flexible hold like ORS Lock and Twist Gel. Be sure to choose one that is not drying.
• Rat tail comb: For parting and sectioning.
The next items are optional but will make the job a lot easier:
• End papers: These will help to ensure that the ends wrap around the straws flat resulting in smoother ends. They also make it easier to wrap shorter hair
• Hooded dryer or bonnet attachment for blow dryer: To speed drying time.
• Spray bottle: To keep hair damp
Ready, set!
As with any style start with clean, moisturized and detangled hair. Determine how large you want each section to be and cut straws to that length. For example, if you will be rolling 1” wide sections cut the straws at least 1” in length (this can be done ahead of time). Smaller sections will last longer and result in a tighter, more defined curl.
Part out a section and detangle from end to root. Make sure it is damp and apply a small amount of gel concentrating on the ends. Comb through the ends to make sure they are flat and fold an end paper vertically over them (optional). Start wrapping the hair around one of the straw sections and roll all the way up to the scalp. Insert a bobby pin through each end of the straw to secure making sure that the hair is also caught in the pin. I prefer putting a bobby pin above the curl at the scalp and another below at the base of the curl.
Continue this process until the entire head is set. Allow to air dry, sit under a hooded dryer or use a bonnet attachment connected to a blow dryer. If allowed to air dry straws will need to remain in overnight. Make sure hair is completely dry before removing the straws. Failure to do this WILL result in frizz.
Set it Free!
Once the hair is completely dry, begin removing the straws. Adding a little oil to the hands before doing this will help to cut down on frizz. I will admit that a small amount of frizz in this style provides a more natural look. After all of the straws are removed begin fluffing and separating curls to close in parts and to achieve the desired fullness.
Congrats you are done!
Considerations:
Hair does not need to be parted straight or all set in one direction.
Some people prefer not to cut the straws and use the full length. I find this more difficult, especially for short hair and you will not be able to sleep on them.
Time to complete is 4 to 8 hours depending on length and thickness of the hair (does not include prep and drying time).
Watch the video below
More from Sandrarose.com:


